> ## Documentation Index
> Fetch the complete documentation index at: https://docs.corgea.app/llms.txt
> Use this file to discover all available pages before exploring further.
# User Management
> Manage your users in Corgea
## Overview
The User Management section of Corgea is designed to help administrators effectively manage user accounts. This includes the ability to add new users, as well as deactivate and reactivate existing users. This guide provides a comprehensive overview of these processes.
User creation is limited by the number of licensed seats in your current plan.
## Billing and seats
Go to **Settings → Company → [Billing](https://www.corgea.app/settings/company/billing/)** to:
* Upgrade your plan
* Adjust seat quantity during checkout
* Open the billing portal to view invoices and manage payment methods
Viewing Billing requires the **Can view company** permission. Upgrading your plan, changing seat quantity, and opening the billing portal require the **Can change company** permission.
If you reach your licensed user limit, upgrade your plan or increase seats from Billing before adding more users.
## Company name
Company admins can rename the company from **Settings → Personal → [Profile](https://www.corgea.app/settings/user/)**, or from the **Company Settings** tab of **Settings → User Management → [Users](https://www.corgea.app/settings/company/members/)**. The name is visible to everyone in your workspace. Everyone else sees it as read-only.
## Timezone settings
Corgea displays dates and times, including scan dates, in your effective timezone. Company admins set the default for everyone under **Default Timezone** on the **Company Settings** tab of **Settings → User Management → [Users](https://www.corgea.app/settings/company/members/)** by selecting a timezone and clicking **Save**. The company default is UTC until an admin changes it.
To use a different timezone for your account, open **Settings → Personal → [Preferences](https://www.corgea.app/settings/user/preferences/)** and select a timezone under **Regional**. The change saves automatically. This personal setting overrides the company default; select **Company default** to follow the company setting again.
## Email verification for password authentication
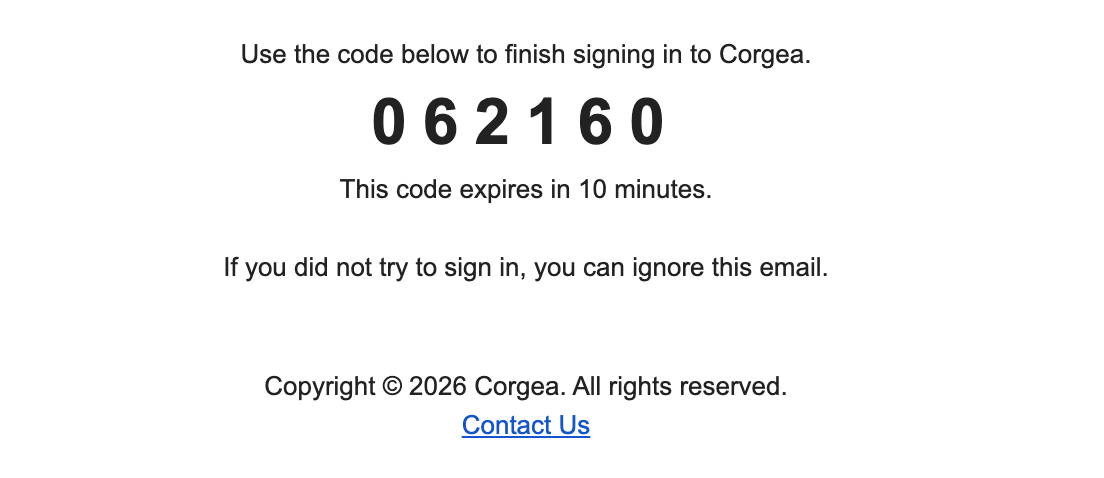
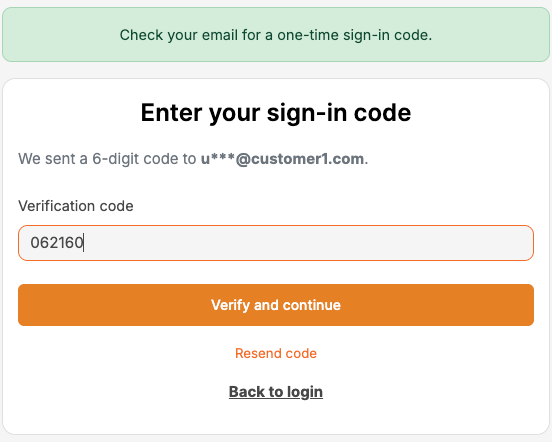
If email verification is enabled for your company, Corgea sends a one-time verification code after you sign in with a password or set a password from a magic link. Enter the code from the email on the **Enter your sign-in code** page and select **Verify and continue**. The code expires in 10 minutes. If you select **Resend code**, only the newest code is valid.
 This extra verification step does not apply to SAML SSO or service accounts.
## Add a user
To enhance the security and functionality of Corgea, users can be added with specific roles and permissions.
Go to **Settings → User Management → [Users](https://www.corgea.app/settings/company/members/)** in the Corgea dashboard.
A modal will appear for you to enter the user's details.
* Email Address: Must be unique for each user. This will be used for all communications and as their login identifier.
* First Name: The user's given name.
* Last Name: The user's family name or surname.
Submit User Information: After entering the details, click the 'Add User' button to create the new user account.
The user will receive an automated email with instructions to register and set their password.
## Deactivate an existing user
In situations where it is necessary to restrict access, Corgea allows for the deactivation of user accounts.
Users that have been deactivated cannot login into the system or reset their password.
Go to **Settings → User Management → [Users](https://www.corgea.app/settings/company/members/)** in the Corgea dashboard.
Find the user in the table and click the **Deactivate** link.
#### Implications
* Access Revoked: Deactivated users will lose access to their accounts immediately and cannot log in or reset their password.
* Data Preservation: The user's data and settings are preserved for future reactivation.
## Activate an existing user
Reactivating a user restores their access to Corgea, allowing them to log in and reset their password if necessary.
Go to **Settings → User Management → [Users](https://www.corgea.app/settings/company/members/)** in the Corgea dashboard.
Find the deactivated user in the table and click the **Activate** link.
#### Implications
* Password Reset: Users may need to reset their password upon reactivation, depending on the duration of deactivation and security policies in place.
* Role Review: It's advisable to review and adjust the user's roles and permissions if necessary.
This extra verification step does not apply to SAML SSO or service accounts.
## Add a user
To enhance the security and functionality of Corgea, users can be added with specific roles and permissions.
Go to **Settings → User Management → [Users](https://www.corgea.app/settings/company/members/)** in the Corgea dashboard.
A modal will appear for you to enter the user's details.
* Email Address: Must be unique for each user. This will be used for all communications and as their login identifier.
* First Name: The user's given name.
* Last Name: The user's family name or surname.
Submit User Information: After entering the details, click the 'Add User' button to create the new user account.
The user will receive an automated email with instructions to register and set their password.
## Deactivate an existing user
In situations where it is necessary to restrict access, Corgea allows for the deactivation of user accounts.
Users that have been deactivated cannot login into the system or reset their password.
Go to **Settings → User Management → [Users](https://www.corgea.app/settings/company/members/)** in the Corgea dashboard.
Find the user in the table and click the **Deactivate** link.
#### Implications
* Access Revoked: Deactivated users will lose access to their accounts immediately and cannot log in or reset their password.
* Data Preservation: The user's data and settings are preserved for future reactivation.
## Activate an existing user
Reactivating a user restores their access to Corgea, allowing them to log in and reset their password if necessary.
Go to **Settings → User Management → [Users](https://www.corgea.app/settings/company/members/)** in the Corgea dashboard.
Find the deactivated user in the table and click the **Activate** link.
#### Implications
* Password Reset: Users may need to reset their password upon reactivation, depending on the duration of deactivation and security policies in place.
* Role Review: It's advisable to review and adjust the user's roles and permissions if necessary.